Saturday 31 January 2015

Tower Block

This first block of our sampler quilt has 6 tumbling blocks made with the paper piecing method to join together in the shape of a tower.

Sewing the diamonds together on the edges requires small neat stitches in a matching thread (not always easy if the diamonds are different colours). A pin helps to keep corners together while you are sewing.

Each of the
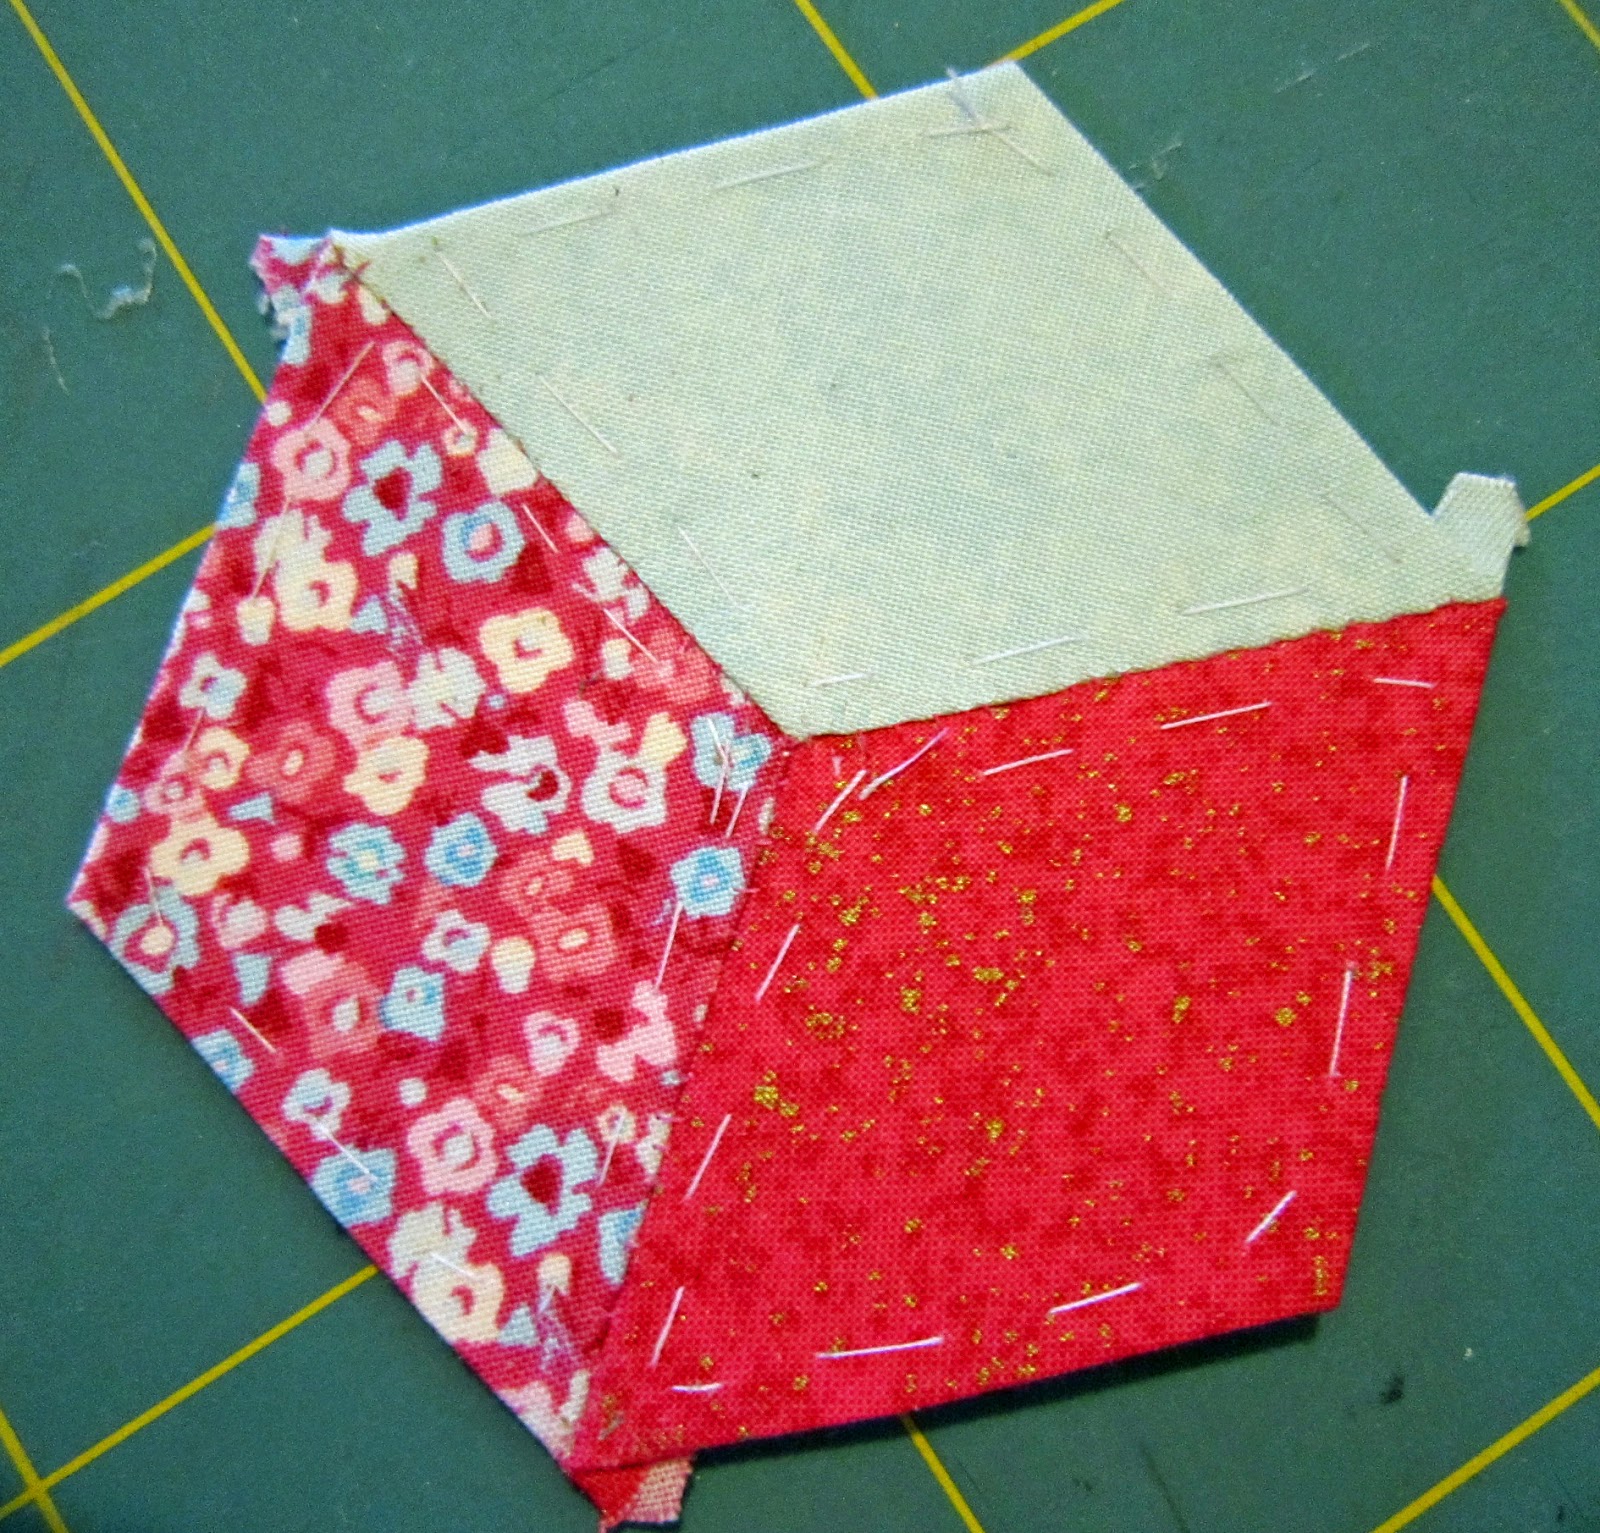
tumbling blocks is a hexagon shape made up of three diamonds joined together to give that 3D image - an optical illusion of a shape which looks like a baby's play block.  Once six are made they have to be joined with small neat stitches as close to the edges as possible so that the stitches barely show on the right side and so that the cartridge paper linings pull out easily once the tacking stitches are taken out.

Lots of pressing on the right and the wrong sides is necessary to keep the work flat and also to press in a sharp neat outside edges which will be appliqued to the background fabric.

When the fabric is first folded over the paper shapes there is a 'tail' which overlaps the long pointed corners as you can see in the first photo.  These have to be left just as they are all the way through the construction of the tower.  On the joined inner edges these curve around each other into a little rosette. 

However when the applique stage is reached outer edges are tacked down and these tails have to be turned in neatly, one fold over the other, and tacked firmly ready for stitching on to the background fabric.  The tacked edges should look like this on the back and the front.


Next, the tower of baby blocks is centred on the 13" square of background fabric and tacked in place to held it flat whilst the applique is done. 

Neat slip stitches in thread that matches the blocks is needed to attach the tower to the background fabric.  In other words hand applique done as invisibly as possible is required.

There may be a need to use different coloured threads as the thread should match the colours of the blocks, not the background.

These last photos back and front show the tower of blocks stitched on but with tacking threads still in place.

the next phase is to add the framing strips, the sashing and then to quilt the block.

To be continued ...


Monday 26 January 2015

Tumbling Blocks

Now for some traditional quilting.  Patchwork over papers is a traditional English method most often used with hexagon shapes.

We are using diamond shapes for this block but you will see that when the three diamond shapes are sewn together they actually create a hexagon which looks like a baby's toy block.

To achieve the right result the block has to be created from fabric with dark, medium and light values.

 We have to make a diamond shaped template to start with and this can be made from card or from template plastic. 

Copy the diamond shape from your circulated email to make the template then use it to copy the shape eighteen times on to cartridge paper.

Cut out the shapes and pin them on the straight grain to the wrong side of the fabric pieces - six shapes to each of the three pieces.  Leave enough space between them to allow for a 1/4" seam all around.

Cut them out roughly at first and then use your quilter's quarter or other measuring equipment to draw a 1/4" seam all around and cut them out accurately snipping the ends off the long points to a 1/4".

When they are all cut out fold the edges of the fabric tightly over the paper and tack down.  Don't worry about the seam allowance overlap at the long pointed corners as this will be hidden later when the blocks are joined together.

 In this photo you can see some diamonds pinned and cut out and others already tacked and pins removed.

 The next part is to place one of each colour into a box shape and join the pieces right sides together with a neat small oversew stitch using a thread colour which will not show.

Make sure the corners match up and as you sew from one of the corners put a pin in the other end to keep the corners together and matching. 
 
After joining the edges together press on both sides and press the little 'ears' down neatly in the same way that they folded when you tacked them down.  later these will dovetail together when joined to another block.

Make up the six blocks in the same way.

The tacking and papers stay in the blocks for the time being.


The next stage will be to join them together and then applique them as a group to the background.

To be continued.


Friday 16 January 2015

Cloth Book Number Two

This second Fabric Art Journal has a buttoned spine and the pages are made individually.

See the buttons on the left hand side which go right through the spine and are stitched to more matching buttons on the back.

The cover wraps around the pages and the edges are finished with zigzag stitches.

If you remember when we made roses from organza ribbon you may recognise these because that is what I have used as a decoration for the front.

Add as much or as little as you want.

The inside covers can also be decorated but I haven't done that on this book.

 Here are two of the inside pages which are decorated with the Suffolk Puffs I brought in to show the Quilting Arts group.

The smaller ones on the right hand side were meant to be included in a Journal Quilt but it went wrong so I cut it up and used just the bits I liked in this Cloth Book.


Perhaps you remember some of the printed images on fabric which I brought in. 

Here I have used Bondaweb to fuse the butterfly and the rose to some fabric which contrasts with the pages.  Then this is stitched on to the fabric page.

The pages are padded and after decoration are sewn wrong sides together and neatened around the edges by hand or by machine.


The yo-yos or Suffolk Puffs were sewn to the page using the buttons in the centre.

An even number of pages are made individually at first, then sewn back to back with wadding in-between and neatened with stitching around the edges.

Everything shown here using machine stitching could also be done by hand.

The unicorns are some machine embroidered embroideries which I did ages ago and never used for their original purpose.  I embroidered them on organza in variegated embroidery thread.  Now they have a use at last and as you can see some of the silk roses we made some time ago are used as an additional feature on this last page.

 In this photo of the cover you can see the small metal clips holding everything together and level so that as the buttons are sewn on the whole thing will end up symmetrical.

After making the pages and preparing the cover I discovered that I had put the decorations too close to the spine edge and would have lost some of my fancy bits when I sewed the buttons through it all.  So the amendment I had to make was to join some extra fabric to the inside edges where I would be sewing through the cover and pages and adding the buttons to join it all together.

Although at the time I was annoyed with myself for making this mistake I realised afterwards that it was a good idea because the thinner centre made sewing it all together much easier.

There is a full worksheet written up and to be circulated at Quilting Arts or by email.

Monday 12 January 2015

The First Cloth Book

Here is a little more about the first Fabric Art Journal (or Cloth Book) which was the subject of yesterday's posting.

The purpose of a cloth book is to keep samples and experiments and little bits of fun in an attractive format to show others and to remind ourselves of different things we have done.

This first one is made up of a cover and 'signatures' which are then sewn to the cover and doubled over to form pages.  So far I have made the cover (but not decorated it yet) and also one signature which is attached to the centre spine of the cover with straight stitching.

Here you see the cover which has been machine quilted as described in yesterday's posting.  This could equally well have been hand quilted if that is your preference. It is made from two different fabrics with wadding in-between and finished around the edges with a close zig-zag stitch on the machine.  Again this could be done in a buttonhole stitch by hand.

If you look closely at the next picture you will see that the signature has been joined to the cover at the centre and then folded to the right to make four pages.  But to the left of the join is another line of stitching.  This marks the spot where another signature will be joined once it is made.

The signature in the photo was made by decorating two pieces of fabric with rows of fancy machine stitches, then assembled with wadding in-between and edged with zig-zag stitch in a pretty thread.

You can see that a gap was left in the stitching where the signature was to be joined to the cover at the centre.

 Again, in the last  photo you can see the pages folded to the left this time and the line of stitching on the right hand side is where the third signature will go. It will be folded first and the fold sewn to this line of stitching by hand.

Once all three signatures are completed and sewn to the cover the book will have 12 pages (not counting the inside covers which could also be decorated).

One idea for the next set of four pages is to trial some labels for our finished work. That would mean putting two on each side of the finished signature.  I will do some examples and we can try different ones out in February.

Ideas for decorating the third signature (four pages) in this first book are welcome.

Looking ahead:  I have made a second Fabric Art Journal in a completely different way and this will be featured in my next posting.  It is finished and I have used lots of bits that were left over from some of our earlier experiments at Bredon Crafters.  In my box I found silk roses, machine embroideries, Suffolk Puffs and ink jet printer images printed on to fabric.

Have a look to see what you are hoarding and which might become a decorative element of a Cloth Book - it's quite exciting making something pretty from a cast aside piece of work or from a rejected effort which has fresh possibilities when cut up and re-cycled into a Fabric Art Journal.

Sunday 11 January 2015

Fabric Art Journal (or Cloth Book)

This looks like being an interesting thing to do.

I started by making a small try-out cloth book with  blank pages, just to understand the method.  But it won't be thrown away after all, it will probably become a store for hand embroidery stitches in a format easy to find and to look at.

Then I went on to make another one with more care and in a larger format.  So far it only has one set of four pages (or signature) as it is apparently called in America.

Here you see the beginnings of a double page.  It is backed with stabiliser ready for embroidery stitches and is marked around the edges and the centre.  After it is decorated with stitching It will be backed with another similar pair of pages with low loft wadding in-between.  They will be sewn together and edged with zig-zag stitches.  This then becomes a 'signature'. It will be joined to a cover at the centre point with stitching.


This is the signature with stitching completed.  The back has rows of fancy stitches as well and you can see the gap at the centre ready to attach to the cover.

I haven't gone too far with this one as I want to develop it with the Quilting Arts membership. 

I have made the outer cover but not decorated it yet.


Here you see the cover being prepared for quilting.  It has a fabric outer and lining with a low loft wadding in-between.

I marked a diagonal line and then quilted diagonal lines evenly spaced apart.

If you have a guide included in your sewing machine accessories this is most helpful in getting the lines the same distance apart.

I have written up the method and will send this out to Quilting Arts members shortly.  This cloth book is work in progress and another signature (or four pages) is planned for next month and will contain examples of labels to be attached to our work.

The content of this first cloth book is quite practical as you can see and mainly designed to be a means of learning and hopefully an inspiration to anyone feeling unsure or apprehensive about this latest project.

In due course the cover will be decorated and the other pages completed. 

In the meantime there is an alternative method and a completed Fabric Art Journal which I will put on the next posting.  the next one is quite different in appearance and method of making up.  This will be posted in the next couple of days.


Sunday 4 January 2015

Happy New Year

Welcome to 2015 Quilters and Sewers.  It's time to get back in business and back to creating lovely things.  At Bredon Crafters we will be finding ways to re-cycle denim.

 I have made a bag with 5" squares of denim  and some other dyed fabric.  Any bag pattern will work as the front, back and sides are all squares joined together.  However about half a metre of lining is needed and some cord and buttons or beads for the pull fastener.  I padded mine with fusible fleece but any wadding will do.

Also you will see I made a mobile phone holster to keep the phone handy when not using a handbag.  This is simply a pocket cut from my daughter's old jeans and the shoulder straps are the outer seams of the legs - very little sewing involved but a good strong sewing machine needle is necessary.

 Thirdly I made a small apron using offcuts of denim and the other back pocket from the jeans. The pattern for this in medium and large sizes will be available, together with some spare denim fabric free to anyone who wants it.  Some cotton fabric will be needed as well, a metre will be more than enough.

Chrys has made a Teddy Bear and some jewellery - so there will be plenty of inspiration and something to think about. No worksheets circulated but instructions can be made available if wanted.

I have started on the Fabric Art Book by making a cover and the first 'signature' which is how the American book I have got describes a set of four pages.

  The Fabric Art Book for Quilting Arts will be the subject of another posting on this blog.  As mentioned I have made the cover and one set of pages.  Already I can see that the cloth books will be a wonderful medium for trying out different skills and techniques and I'm looking forward to practising a variety of embellishments and using up neglected bits and pieces that currently are just lying around.  Watch this space!