Friday 20 June 2014

Carry On Quilting

The second panel of my interpretation of the Scrap House Quilt is quilted.  I have used a variety of methods including free motion, normal machine stitching, fancy built-in stitches and some pieces left without any quilting at all.

It's hard work because the different areas of the quilt have their own character which needs to be echoed by the quilting.  So a lot of variety, imagination and innovation is needed.

But it's certainly not boring.  I don't think I could ever make a conventional quilt with the same patchwork repeated time and again all over it because to me that would be the pinnacle of boredom.

So the scrap house quilt idea is demanding in terms of having to think about it all the time and having to keep making decisions about what next.

It's very colourful.


One thing I have discovered about the house blocks, if you don't want to put masses of quilting on the house walls to keep them from bubbling, use some spray starch on them to make them nice and crisp.

This project is really good practice for machine embroidery, and trying out new stitched shapes is not too frightening because it all blends together and looks good even when not perfect. Using variegated quilting thread adds to the interest and enjoyment and also disguises less than perfect work.

So the third piece is now demanding attention.  I'm still not confident that I will get the quilt finished for the Flower Festival but that doesn't matter because its main purpose is to be an example and a learning curve for me and anyone else who wants to try making it,.

To be continued ...


Tuesday 17 June 2014

Quilting the top

I don't seem to have got very far with the quilting!  I have finished one of the three sections, but it is the smallest one.  Lots of interruptions, phone calls, other stuff - that's my excuse anyway.

It takes a while because the nature of the design has lots of differing parts to it which means that I decided it needed a relevant type of quilting for each bit - not one design across the whole lot.

Of course it doesn't have to be done that way but having started it like that I have to continue.

Seeing it develop is fun though and most of all really good practice if you want to get better at free machine quilting.

Now I'm not confident that I will get it finished in time for the exhibition.

It's interesting to see the back of the quilting stitches because it is not confused by the fabric's print.  See image below. You can tell if your idea or plan has actually taken shape as you wanted it too - or not!  Another thing is that from the back you can see how your stitch tension is working out and adjust it if necessary.


One decision left to be made is what sort of border to put on it.  Because there is so much variety in the top itself I don't want to give myself a huge amount of work with the border - so it may be a plain one and perhaps one that matches the backing.
 Sections two and three are twice as wide as this one but whether that means twice as much work remains to be seen.

One thing - quilting it in sections is definitely an advantage over trying to do it all in one go on an ordinary domestic sewing machine.

If I reach the conclusion that I won't get it finished for the exhibition I shall put it on hold and pick it up again later.

To be continued .....

Sunday 15 June 2014

Quilting The Top

The three sections of my Scrap House Quilt are ready and waiting to be quilted.  First there is some preparation to do as follows: 

Back the sections with wadding a little larger than the top (I have used more than I need here).


 On a flat surface smooth out the top on the wadding and tack the top in place.  Start from the middle and work outwards with a series of grids about 4" apart. 

 Select some cotton quilting thread in colours to blend or match your design.


 If you are machine quilting wind some bobbins in cotton thread - I am using white - and it's a good idea to wind a few so you don't have to stop once you get into the swing of things!

If free motion quilting set up the machine for that with the special foot, set stitch length to 0 and adjust your tension until the practice stitches look even on the back and the front.  Put the feed dogs down.  Ask for help if you want to practice some free motion quilting when we next meet.


 At this stage I am not putting a backing behind the wadding because I will have to join the three sections together and I want the backing to be in one piece - more on that later.

Prepare a practice piece with cotton and wadding pinned together.  Try out your stitches and have a go at the shapes you will use on the quilt.

Here you can see quilter's gloves in the picture.  These have rubbery dimples on the fingers and make moving the materials around much easier when doing free motion quilting.
  When you have tried out your planned stitching technique on the practice piece turn it over to see if the machine tension is ok.

Working with sections instead of the whole quilt obviously makes it easier to get the layers under the arm of the sewing machine.

Start quilting from the middle and work outwards.  You can roll up the sides or edges and pin with large safety pins.
 
An advantage with free motion quilting is you can work in whatever direction suits you so you can turn the work into the most advantageous position.
Now I am going to quilt this first section and then move on to the other two sections in the same way.

To be continued ....


Wednesday 11 June 2014

Scrap House Quilt

Oh I'm so pleased the patchwork for the quilt is done.  It is in 3 sections ready to tackle the quilting next but I must tidy up first - bits of fabric everywhere and lots of patchwork pieces left over - I feel a mini project coming on!

In yesterday's blog I mentioned half square triangles and the multiple ways to use them in the Scrap House Quilt.  Also I have used quite a lot of curved pieces for gardens and landscape.

For a change I thought I would make some flying geese units in the way that Jane demonstrated to us at Quilting Arts last time so here are the photos.

Take one 2.5" X 4.5" rectangle in printed fabric and two 2.5" squares in plain fabric.

Fold the printed fabric in half across the 2.5" measurement.  Place this on top of a plain fabric square, folded edge at the top and 1/4" of plain showing above the fold.


 Place the second fabric square on top matching the raw edges.

With the folded edge still at the top pin and then sew the left hand edge with a scant 1/4" seam.


 Open out and press the printed fabric into a triangle as shown here.

When you have made several and want to sew them together use only a scant 1/4" seam so that you don't lose the points at the top (as you can see from the photo that is exactly what I did!)


When Jane demonstrated this technique she pointed out that the edges of the folds can be rolled and hand stitched down in the style of cathedral window quilting.  Mine shown here are just pinned in place not sewn down.


For my quilt I made a strip of these to fill the bottom corner.  They can just about be seen on the photo below.


So the next step is to put wadding and backing on the back of the three sections and do the quilting.  After that I will join them together and decide whether to add a border before binding and finishing.

Still a lot to do then!

To be continued ....

Tuesday 10 June 2014

Half and Quarter Square Triangles

A little mass production for the last couple of days making lots of half square triangles, some quarter square triangles, some curved landscape pieces and other oddments.  I have set myself the goal of getting the scrap House Quilt made next and with luck in time for the exhibition.
 
Cut some light and some dark squares (mine were 4") and lay them right sides together (RST).

Using a Quilter's Quarter (shown here) draw a diagonal line across from corner to corner, mark and stitch 1/4" each side of the line and cut the squares in half, open up and press well. Trim off the 'ears'.
 I churned out a lot of half square triangles but discovered that although useful on their own it could get a bit boring.

But there are lots of ways they can be used.  I put some of them RST and drew a diagonal line across then sewed on either side of this line then cut them across to create two smaller shapes.


As the shapes come together there are lots of seams to manage and when the seams are on both sides it is best to pin inwards from the raw edges perpendicular to the edge of the fabric as shown here.  You can leave the pin in place right up until the machine needle is holding down the seam in the right way and then remove the pin. (See the image below).

The half square triangles can  be stitched into the pinwheel shape as shown here as well as saw tooth strips and many other types of block.

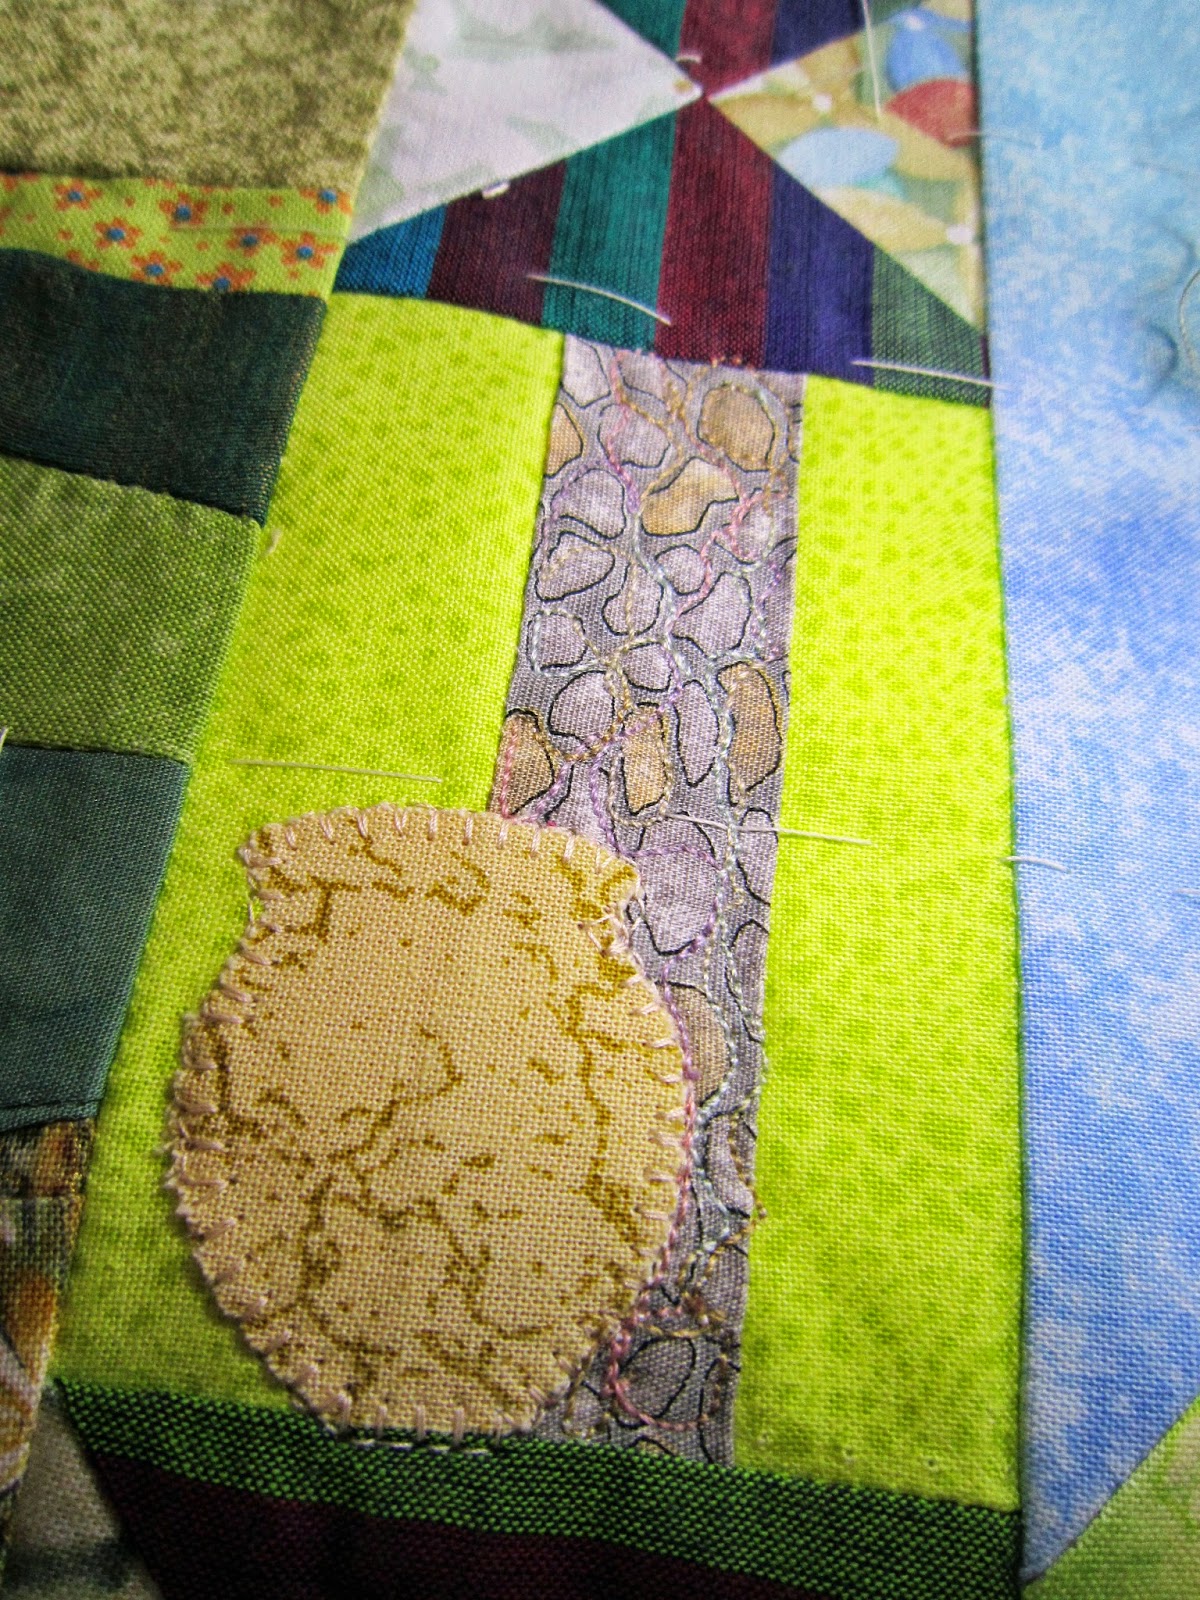
As I added pieces on I made up other shapes and I fussy cut some animal pictures out of a farmyard fabric.  I also made landscape blocks using the curved cutting technique.  It became very addictive.

The message is this:  don't be put off because it seems complicated and daunting.  I think you will find, if you do decide to give it a try, that you get drawn into the fun of it and your own design and methods will emerge. Once started it begins to take shape under its own steam.

I decided to make mine up in three blocks so that getting the bulk under the arm of the sewing machine for quilting would be easier, the blocks to be joined together before putting on the border and edging.  So far I have the top of two blocks completed and the third is work in progress.  I am aiming for a size about 60" X  40" with the blocks roughly about 20" X 40" each.

I had already made nine houses and had added surroundings such as gardens and trees.  I laid these out on a bed to decide placement of each house and spread them roughly to the size I was aiming for.  This basic outline then leads the way into the size, shape and colouring for the blocks and the pieces needed in between.

There is a lot of work in the Scrap House Quilt but it is one of those projects that once started you want to get back to it as often as you can - and as it starts to grow the results are very rewarding.

For those who want to have a go at making this type of quilt the techniques can be covered in our group sessions if you like - just ask me to demonstrate and back that with a worksheet.

To be continued ...


Saturday 7 June 2014

Scrap House Quilt

It's been over a week since I posted anything on here.  What with excursions, hospital appointments (not mine!) and having extensive maintenance on the laptop this is my first opportunity to catch up.

I want to get the little houses quilt made in time for the exhibition and also as an example for anyone else who wants to make it.

So I am going to post photos of my progress.  Mine will be different in some ways to the Katherine Geurrier one but similar in other ways.

As quilting a large area is not easy on a domestic sewing machine I have decided to make mine up in three parts with the joins across the width.  It could easily be made up in smaller sections if necessary.

It's a good idea to sketch out the size and shape on paper first before sewing blocks together so that you know what surrounding blocks you need around the little houses.  Also if doing it in sections to help get the sections to the right size.

Lay out all the houses on a flat surface like a bed and decide on their position in the quilt and where the joins will be.  The sections can then be worked on separately and can relate to the sketch you have done.  As you sew the pieces together aim for the size you want for each section and for the overall quilt.  You will probably have to put quite a few pieced blocks above and below the houses to get it to the size you want.

I have made nine houses with surrounding gardens or landscape so will put three houses in each section.

My additional pieces between the houses will be curved strips and saw tooth strips, half square triangles and pinwheel blocks, diamond strips and possibly some small inserts of fabric that I just happen to like for its colour or design.


At this point then I have lots of pieces cut out ready to be made up.  Diamond strips are shown here and if you need a reminder of how to do this it is on an earlier blog or the DVD still available to borrow.


The other main piecing I am doing is to make lots of half-square triangle blocks which can then be made into pinwheel blocks or quarter square triangles or saw tooth strips.  Again all these methods are either on the blog or have been circulated before and are to be found on the DVD available to borrow on request.

 To be continued ........